Blog Başlığı
Tarih
The most common mistake people make when they want to start streaming is beginning with a shopping spree: a ring light, a studio mic, a new phone... Yet viewers usually forgive an average picture. What they don't forgive is audio they can't understand, a stream that keeps freezing and a face lost in the dark. So your priority shouldn't be “a better camera” but “fewer problems.”
In this lesson you'll learn how to build a professional-looking stream with the phone you already own, spending nothing or very little. We'll go through audio, internet, lighting, framing and phone settings in order, and by the end you'll have a 10-minute technical checklist to run before every stream.
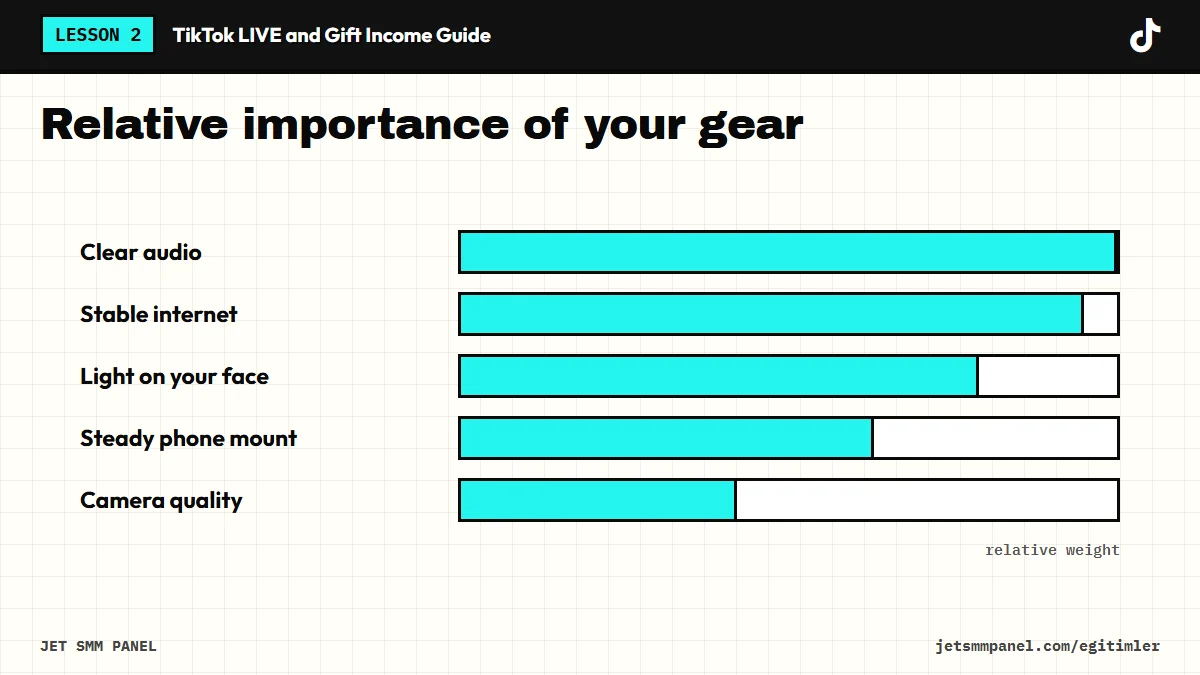
The bars in the graphic are not a measurement; they show relative priority. The logic is simple: if viewers can't hear you or the stream freezes, they swipe away within seconds. If the picture is a bit dull but what you say is valuable, they stay. So if your budget is limited, spend it on audio and connection first.
| Area | Free / low-cost start | When to upgrade | Priority |
|---|---|---|---|
| Audio | Wired earphone mic or an affordable lavalier mic | When comments say “can't hear you” or “there's an echo” | High |
| Internet | Stable Wi-Fi close to the router | When the stream often freezes or drops | High |
| Lighting | Daylight from a window you face, a desk lamp for evenings | When your face is dark in evening streams | Medium |
| Mount | A basic tripod or a stack of books | When you're forced to hold the phone | Medium |
| Phone | The one you have now | Only after everything else is solved | Low |
Your phone's built-in mic works fine when you're close to it in a quiet room. Problems start when you move away or when the room echoes. A room with bare walls and little furniture bounces sound around; viewers describe it as “sounds like you're in a bathroom.”
A radio, TV or playlist running in the background may be copyrighted and can get your stream muted or trigger a guideline warning. If you stream from a café or shop, consider turning the ambient music off or down while you're live.
A LIVE stream constantly uploads data, so upload speed and connection stability matter more than download speed. Seeing a high number for a few seconds isn't enough; the connection needs to stay steady for an hour.
Long streams heat up your phone and drain the battery fast. Keep it plugged in for the whole stream, take off the case and keep it out of direct sunlight. Overheating phones can throttle performance and hurt stream quality.
Good lighting starts with sitting in the right place, not buying a ring light. Daylight is free and softer than most artificial light. The rule is simple: the light source should be in front of your face, not behind you.
In evening streams, try not to mix light sources of different colors. When a warm yellow desk lamp and a cool white ceiling light hit your face at the same time, skin tones can look odd. A single type of light gives a more professional picture.
Most viewers watch TikTok LIVE on a phone, in vertical mode. Comments cover the bottom of the screen, and gift animations and buttons take up other areas. So keep everything important in the upper and middle part of the frame.
The rear camera usually gives better image quality, but you can't see the comments, which kills interaction. Start with the front camera. Later, if you have a helper or a second device to follow comments, you can experiment with the rear camera.
If you want to stream from a computer, TikTok's desktop streaming tool is available to some accounts and regions, and access rules can change over time. If you plan gaming streams or screen sharing, check the Help Center to see whether it's available to you. For getting started, a phone is more than enough.
Pilots use a checklist before every flight, not because they lack experience but because even experienced people forget things. Save the list below on your phone and run through it before every stream.
Before going live, open the camera with your exact setup and record a normal 30-second video. Watch it back with earphones: Is the audio clear? Is your face well lit? Is anything distracting in the background? If all is good, go live.
Once your setup works, try to use the same spot, the same angle and the same light for every stream. A consistent look makes your life easier and gives viewers a sense of “this is their place.” With the technical side ready, we can move on to the question that really matters: what exactly will you do on stream? In the next lesson we'll build LIVE formats and a minute-by-minute run-of-show template together.
Pick the spot at home or at work where you'll stream. Run a speed test there three times, adjust your position to the window and record a 30-second test video. Review the audio, light and background one by one, then save the 10-minute checklist as a note on your phone.
Buy the course to unlock the remaining 5 lessons.